Showing posts with label Glass Bead. Show all posts

Monday, July 6, 2015

Finding the Right Camera Angle


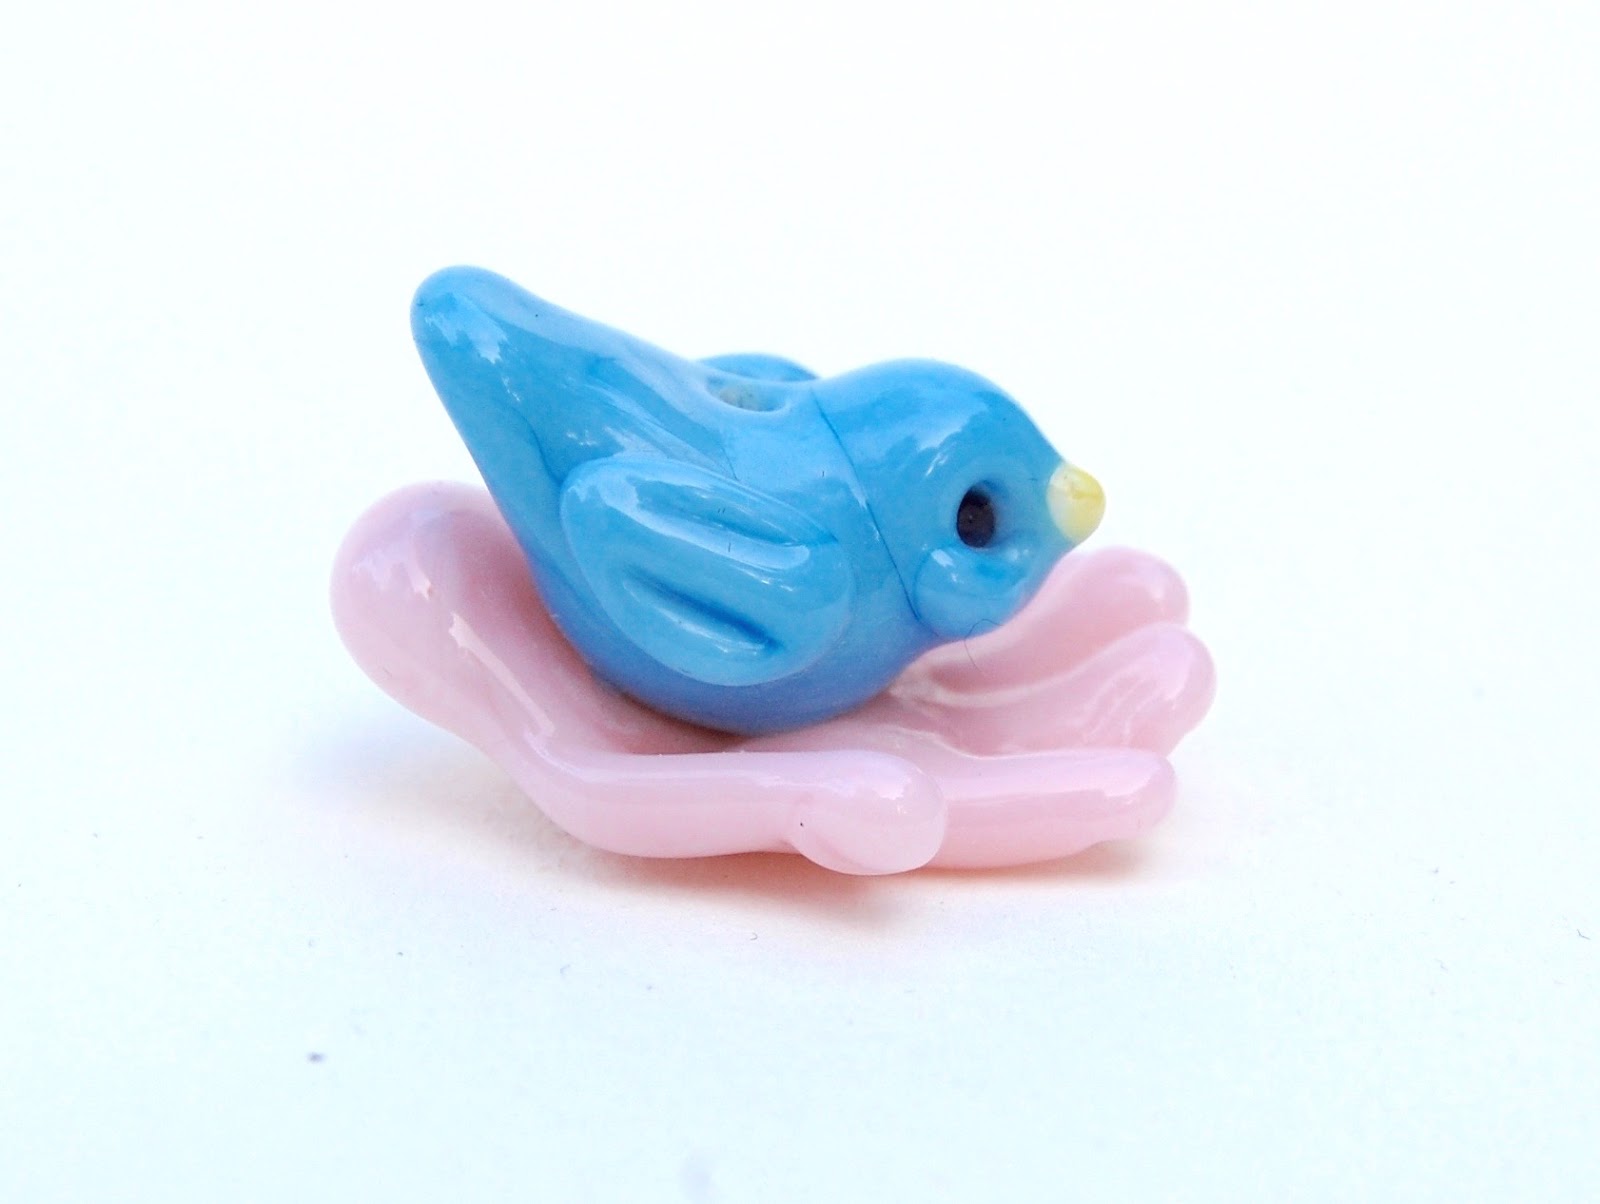
Finding the right camera angle on sculptural beads sometimes is easy and sometimes, not so easy.  Here is one of my "Bird in Hand" beads.  The hole goes vertically through the middle.

Sometimes, it's just what is the part that should be the focal part of the bead.  Is it the hand, the bird, or the combination.  The hand is the harder part to make, and the bird is the colorful focus.  So I want both.  The technical detail needs to be showcased for adding value. For a beadmaker,  that's the hand. Keeping the fingers extending and and all a bit different, takes experience and technique.  The bird is far easier to make, but adds charm for the viewer and wearer.  Being blue, it could be interpreted as a bluebird of happiness.

So for me, I prefer the bottom photo.  The bird looks cute and chubby.  The hand shows enough for the viewer to see that there are individual fingers cradling the bird.  Which view do you prefer and why?

Thursday, February 19, 2015

Free Shamrock Glass Bead Tutorial by Marcy Lamberson ~ Studio Marcy


Lampwork Glass Shamrock Quick Mini Tutorial
Nothing like a freebie, is there?


Tools   
a. 1 rod of transparent green glass
b. parallel mashers (any mashers are fine)
c. glass shears 
d. Stump Shaper - other tools will work as well


Step 1.  Base Bead
Using your transparent green glass, make a base bead that is shaped  kind of like a fat football.


Step 2.  

Gently mash your base bead to flatten it into a thick oval.
Then using your glass shears, make your first cut as pictured above.
I am using a 1/16th mandrel and you can see that I am careful to snip near the mandrel, but not close enough to jeopardize breaking bead release.


Step 3.

Snip the rest of the cuts as pictured for a total of 4 cuts.  You can see you have made the basic shape of the shamrock already.  Please keep the base warm, but not hot.  If you accidentally warm it too much, then gently flatten with your mashers to return to the shape you need.


Step 4.

Now make mini snips on each of the horizontal petals.  Only go in about a third of the way.  Two snips total with your glass shears.


Step 5.

Use your flame (keep the heat gentle) to warm the top petal that is divided by the mandrel.  I do a combination of heating one side and holding the mandrel on an angle upside down to slightly droop the glass to help form the rounded section, and also using my brass Stump Shaper to gently indent the glass close to the mandrel.  It's almost like making a mini heart.  If you are having problems, then feel free to add a dot or two of glass on the outside edges away from the mandrel, to give it more definition.  Do both sides.


Step 6.

I use my brass Stump Shaper to gently push in the glass at the bottom to form more of a stem.  Both the non sticking brass and the wedge of that tool make it easy to get in there and gently press toward the mandrel to make it look more stem-like.  Voila, you are done.  Pretty easy, isn't it?
~

And perhaps you aren't into shamrocks, but this easy technique would be great for flowers as well.  I could see them with frit, stringers and even and extra raised dot in the center with a cool murrine, or so many other ways.

Hope you enjoyed this easy tutorial.  I have decided that I will be making more of these for your enjoyment.  Please stop by and see me on my FB business page or my StudioMarcy etsy shop

Monday, June 25, 2012

Sixty Ladybugs for Beads of Courage...Done!


It's bug season.  Ladybug Stars for Beads of Courage have been populating my studio recently.  You can see most of the 60 that I completed in this photo.  I have made it as a limited edition 100 beads and all are completed now. (can you see me doing a happy dance over here?)

This bead was designed by a young Pittsburgh patient for Beads of Courage.  I took her drawing, and did my best to interpret it in glass.  We even emailed, so we could come up with a design on the back-  which is the flower that you see.  You can buy these fundraising beads from Beads of Courage here.

And of course, I have to tell you about the BoC book.  My bead is on the cover along with the Jester bead that my friend Stephanie White made.  You can find the $14 book here.  It's a small book that has photos of each of the beads offered.  The different ones were each designed by someone associated with Beads of Courage- patients, medical staff, etc.  And then interpreted by members of the lampwork community.

So I know that this post is kind of a sales pitch, but it's for a great cause and not for me.  I love this organization and have personally seen what a difference it makes in these kids and their family's lives during their illness.  And it makes me see the strength and courage it takes to get through all of it.  I am in awe.

Hope you have a wonderful week.  See you right here tomorrow!


Monday, March 19, 2012

My StudioMarcy Etsy Shop Is Being Re-Stocked


I am starting to restock my Etsy shop! Hooray.  I will be starting with some of my favorite beads which are in stock and then as I finish up some of my show deadlines, I'll be adding more new ones.  Here is Serena the Seahorse.  You can find her if you go to www.StudioMarcy.etsy.com (and see my other beads too!

Sunday, November 28, 2010

Arrrgh, Pirate Snowmen

I've noticed that pirate snowmen aren't too available these days, so I decided to offer up my secret stash of swarthy icy he-men. This one has his hook, parrot, and of course a dubloon hanging from his neck. You can find him in my Etsy shop, if he hasn't already been kidnapped by a pirate loving wench.

ps He would make a cool tree ornament as well. If you need help adding a wire loop, I'm happy to help you.

Wednesday, January 6, 2010

Guess What I'm Doing?


Guess what I'm doing today?

Look down the checklist for the fourth bullet. I'm teaching a private lesson. But this isn't just any private lesson, it's one where my student came from out of state and is staying for a few days. Oh boy, it's fun!

We started on Tuesday and will go through Friday. It's mostly about sculpture and learning how to look at photos and 3D items and translate them into glass. There are different steps and techniques to learn along the way which is what we're following, but at the end, we'll have plenty of time for specific beads that she wants to learn. I hear dragons, mermaids and angels are on that list.

So if you don't see me around quite so much, I'm having a ball working with my friend. Lots of glass, chatting and learning all going on at once.

See you tomorrow- same time, same place.

Saturday, August 22, 2009

Great Post by Loribeads - Lori Peterson: Fellow Fire Diva

Check out Lori's sweet post about one of my beads! Thank you so much Lori. It means a lot coming from you.
Loribeads - Lori Peterson: Fellow Fire Diva...Marcy!

p.s. I'm sure I'll be back for more murrini from you this week. I love what you and Kim are making.


Friday, December 5, 2008

Fond Memory Beads ~ Winter Wonderland


Many of you know that I live in Atlanta, Georgia.  It's been my home for over 14 years, and it's a lovely place.  Plants grow without you needing to cajole them just to stay alive, wildlife and nightlife abound, and it's home to lots of glass friends who also feed my soul.

But this is the time of year, when one's thoughts turn to the beginning of winter, Christmas holidays and one of things missing in my life....snow.

I realize that many people would be happy to give it up.  I don't miss shoveling it, driving in it or even dressing for it.  But I do miss the sun sparkling on newly fallen snow, its pristine beauty and of course...playing in it.

I have very fond memories of my many years in the Rocky Mountains. Both in Wyoming and in Colorado. The beauty of snow capped peaks, mountain cabins and the scent from their wood stoves, the chilly mountain streams and snow covered pines.

And it seems like every year I make a snow scene bead of my fond memories.  This one reminds me of the place we stayed to go cross country skiing with friends.  One side has the cabin and the other side has the stream.  I wasn't able to capture the pink cheeks, fresh air and peels of laughter that weekend.

So how would you make your Fond Memory Bead?  What would go on it?  I have plenty of fond memories for many more.  These beads are the type that you should make one to save for yourself as well as one to sell or give away.  They're fun and you will smile every time you see it.

This one is available in my Etsy store.  And just in case you missed it, I have a Buy One, Get One Half-Price Sale going on through tomorrow.  I'm still adding more new beads daily as I always do.  Hope you can stop by if you've got a minute.  And if you have a photo of a fond memory that needs to be captured in glass, I enjoy custom orders.